
This page presents the getting started guide of the Esus board.
Presentation
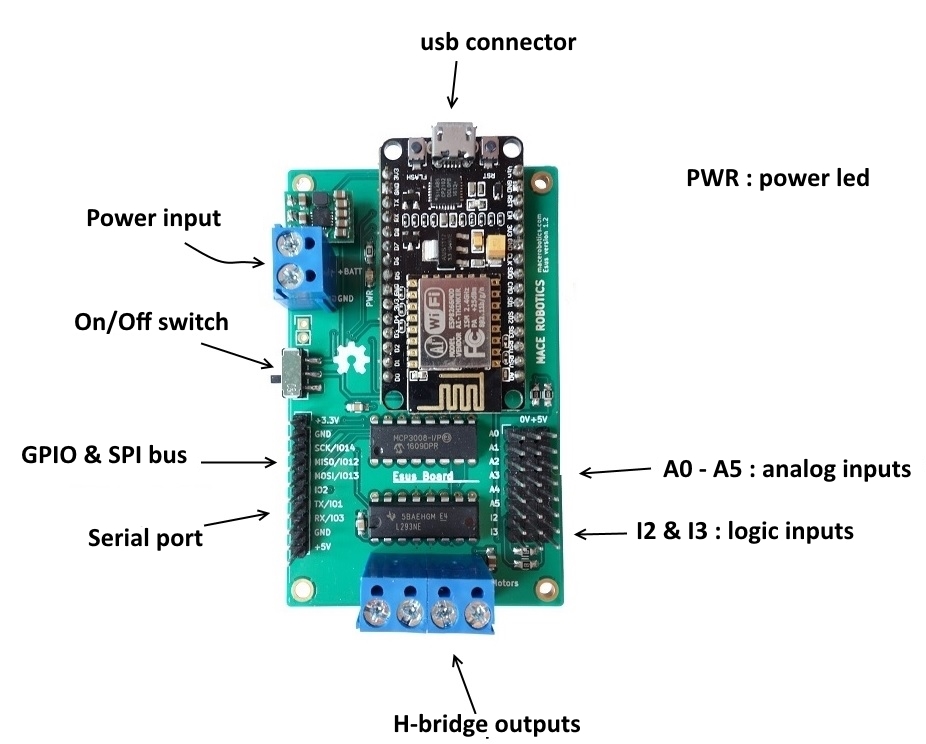
| Power | 2.8 – 11.8 V |
|---|---|
| Microcontroller | ESP8266 80 Mhz |
| Analog Input Pins | 6 |
| Mini-usb connector | programming Esus board |
| On/Off switch | Turn on and off the board. The PWR green led will light when power on. |
| 10 pins connector |
|
| H bridge out |
|
| Analog inputs (A0 – A5) |
|
| Logic inputs (I2 – I3) | Logic inputs (0 or3.3V) |
Arduino IDE installation
- Dowload Arduino IDE : https://www.arduino.cc/en/Main/Software
Configuration
The first step is the configuration of the Arduino IDE for support the ESP8266 microcontroller.
- Open Arduino IDE.
- Next:
- File->Preferences
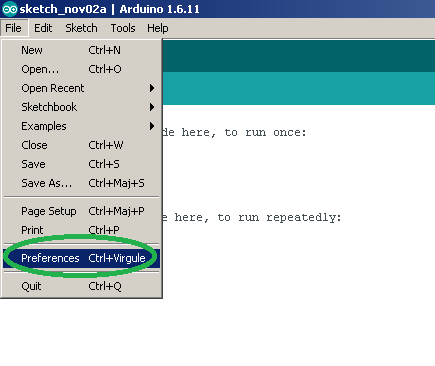
- Additional Boards Manager URLs :
http://arduino.esp8266.com/stable/package_esp8266com_index.json
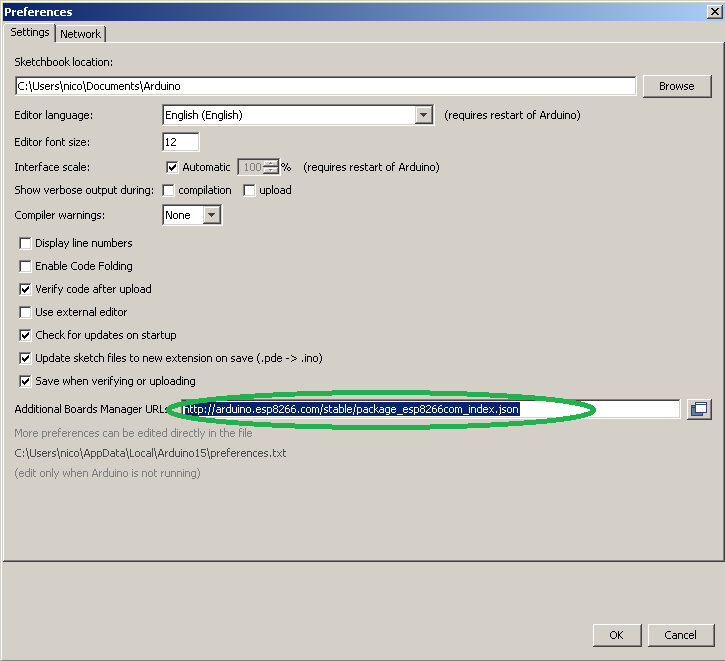
- Click Ok
- Then , menu : Tools->Boards Managers :
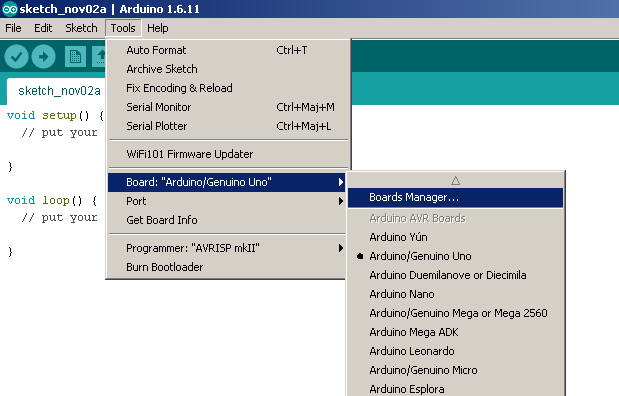
- Then, search « esp8266 » :

- Install « esp8266 by ESP8266 Community » :
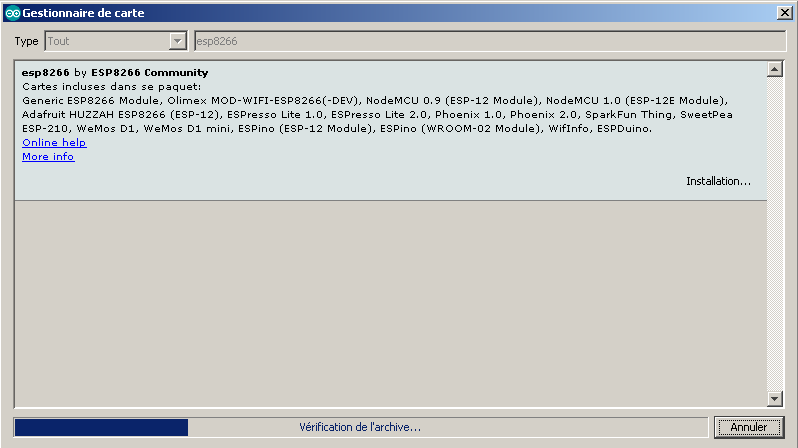
- Tools->Boards :
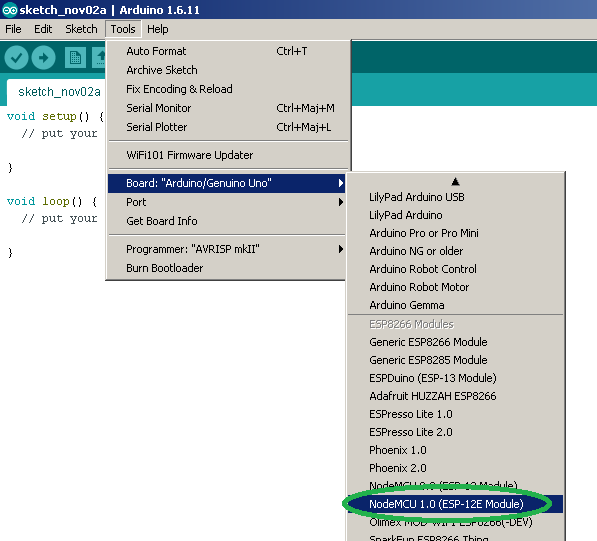
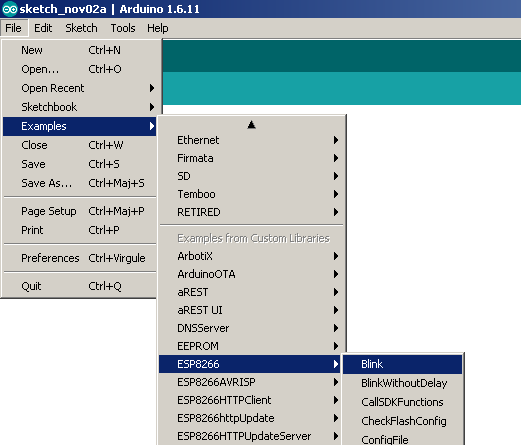
Blink exemple :
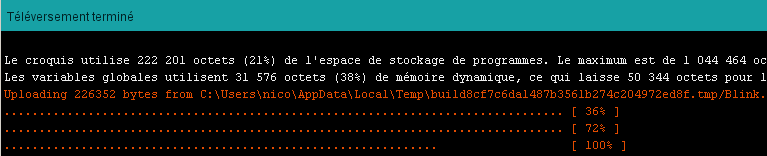
- Verify and uploid the program :
Install Esus libraries
- Dowload arduino lib for Esus lib : here
- Software/Arduino

Then, puts this files in the repertory “libraries” of Arduino IDE :
- esusBoard.cpp
- esusBoard.h

- Repertory EsusBoard with .c and .h files:

- Now, you can program the Esus board.
A simple exemple
#include <esusBoard.h>

int ledPin = 2;

void setup()
{
  // initialisation
  initEsusBoard();

  // initialisation output
  pinMode(ledPin, OUTPUT);

}

void loop()
{
  // turn on the led
  digitalWrite(ledPin, HIGH);

  // 2 secondes (2000 ms)
  delay(2000);

  // turn off
  digitalWrite(ledPin, LOW);

  delay(2000);
}