Voici un nouveau tutoriel afin d’installer le module camera V2 de 8 méga pixel sur le robot MRPi1 : installer la camera V2 Pi
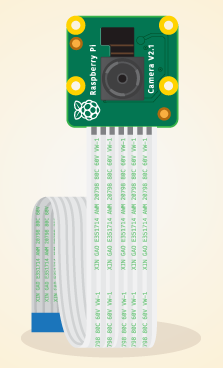
Voici un nouveau tutoriel afin d’installer le module camera V2 de 8 méga pixel sur le robot MRPi1 : installer la camera V2 Pi
Voici quelques photos de l’avancement de la production du robot MRPi1:

Roues

Visserie

Pi & support
Voici le détails sur la conception & fabrication du robot MRPi1 :
Un choix a été fait pour réaliser une production la plus local possible.
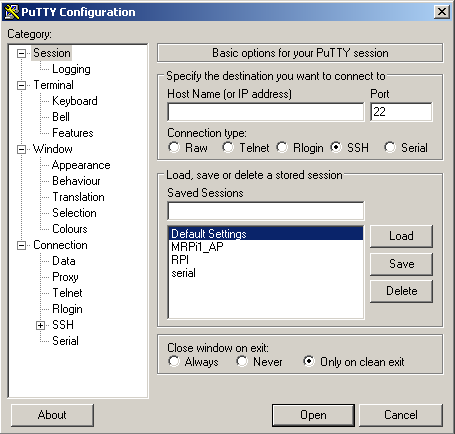
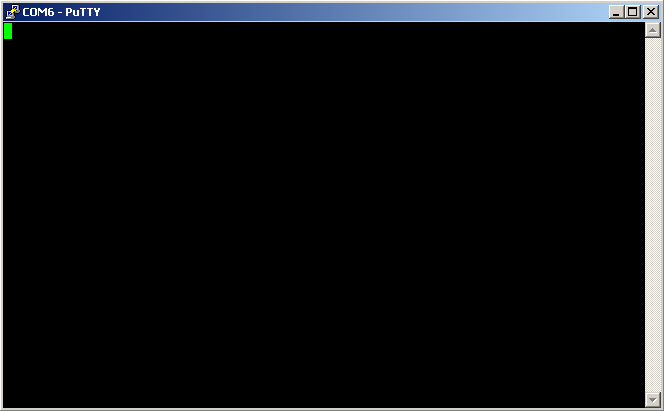
Voici un petit tutoriel pour utiliser le logiciel Putty en mode série.
Putty est un logiciel client SSH, telnet et peut aussi servir de terminal de liaison série sous Windows. Je l’utilise pour débugger des cartes électroniques avec une liaison USB-série (FT232).
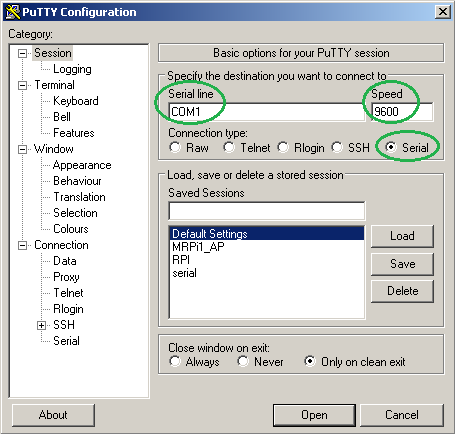
Configuration pour la saisie des commandes en entrée :
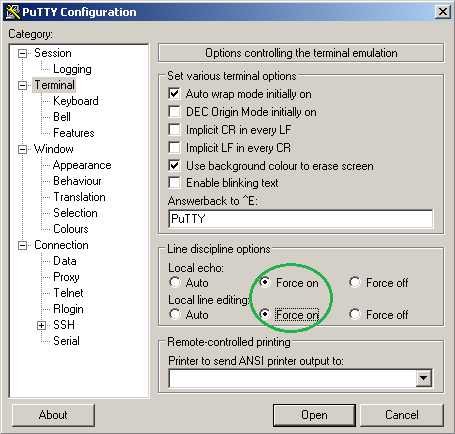
Dans la partie Line discipline options :
Fin du tuto !
Article sous licence : CC-BY-SA
![]()
Un questionnaire en ligne sur le robot MPRi1 :http://shop.macerobotics.com/
Je vous remercie de votre participation.
Nouveau tutoriel pour réaliser du streaming vidéo avec la camera Pi sur la carte Raspberry Pi : http://fr.macerobotics.com/developpeur/tutoriels/streaming-video-avec-la-camera-pi/
Je vous informe que l’entreprise Mace Robotics sera présent le samedi 30 avril à la première rencontre Nationales Raspberry Pi à Nevers.

Information : http://adn.agglo-nevers.net/index.php/rendez-vous/1-premieres-rencontre-nationales-raspberry-pi
Nouvelle vidéo, une course de deux robots MRPi1 complétement autonome :
Les deux robots sont programmés pour suivre le chemin tous en évitant les obstacles. Le robot MRPi1 version Raspberry Pi est programmer en langage Python et la version arduino en langage arduino.
Voici le programme en langage Python pour le MRPi1 Raspberry Pi :
# importez la librairie du robot MRPi1
from mrpi1_lib import *
import time

# initialisation de la vitesse
speedFast=50
speedSlow=30

# seuil détection obstacle
limit_obs = 300

try:
  while 1:
    # lecture des capteurs de proximité
    prox1 = proxSensor(1)
    prox2 = proxSensor(2)
    prox3 = proxSensor(3)
    prox4 = proxSensor(4)
    prox5 = proxSensor(5)
    prox6 = proxSensor(6)

    # si obstacle présent sur tous les capteurs
    if prox1>limit_obs and prox2>limit_obs and prox3>limit_obs and prox4>limit_obs and prox5>limit_obs and prox6>limit_obs:
        # tourner à droite
        turnRight(speedSlow)
    elif prox4>limit_obs or prox5>limit_obs or prox6>limit_obs:
      # si obstacle à droite, tourner à gauche
      turnLeft(speedSlow)
    elif prox1>limit_obs or  prox2>limit_obs or  prox3>limit_obs:
      # si obstacle à gauche, tourner à droite
      turnRight(speedSlow)
    else:
      # sinon avancer
      forward(speedFast)
      time.sleep(0.4)
except:
  stop()
  exit()
Le programme en langage arduino pour le MRPi1 version Arduino :
// librairies du robot MRPi1
#include <mrpi1_arduino.h>

// variables pour les capteurs de proximité
int prox1;
int prox2;
int prox3;
int prox4;
int prox5;
int prox6;

// initialisation de la vitesse
int speed = 60;

// initialisation de seuil des obstacles
int limit_obs = 300;

void setup()
{
  // initialisation du port série
  Serial.begin(115200);

}

void loop()
{
  // lecture des capteurs de proximité
  prox1 = proxSensor(1);
  prox2 = proxSensor(2);
  prox3 = proxSensor(3);
  prox4 = proxSensor(4);
  prox5 = proxSensor(5);
  prox6 = proxSensor(6);

  // Si obstacles présent sur tous les capteurs
  if((prox1 > limit_obs) and (prox2 > limit_obs)and (prox3 > limit_obs) and (prox4 > limit_obs) and (prox5 > limit_obs)  and (prox6 > limit_obs))
  {
    // reculer
    back(speed);
  }
  else
  {
    // si obstacle à gauche
    if((prox1 > limit_obs) and (prox2 > limit_obs))
    {
      // tourner à droite
      turnRight(speed);
    }
    else
    {
       // si obstacle à droite
       if((prox6 > limit_obs) or (prox5 > limit_obs) or (prox4 > limit_obs))
       {
         // tourner à gauche
         turnLeft(speed);
       }
       else
       {
          // si obstacle à gauche
          if((prox1 > limit_obs) or (prox2 > limit_obs) or (prox3 > limit_obs))
          {
            // tourner à droite
            turnRight(speed);
          }
          else
          {
            // sinon avancer
            forward(speed);
          }

       }
    }
  }
}
http://fr.macerobotics.com/developpeur/tutoriels/gestion-des-leds-version-arduino/

New video of MRPi1 robot :
The python program :
from mrpi1_lib import *
import time

ir = 0;
state = 0

controlEnable()


while 1:
  # read the infrared receiver
  ir = irReceiver()
  time.sleep(0.2)

  if(ir == 1) and (state == 0):
    forwardC(10,400)
    state = 1
  if(ir == 2) and (state == 0):
    forwardC(10,800)
    state = 2
  if(ir == 3) and (state == 0):
    forwardC(10,1600)
    state = 3
  if(ir == 3) and (state == 1):
    forwardC(10,1200)
    state = 3
  if(ir == 3) and (state == 2):
    forwardC(10,800)
    state = 3
  if(ir == 2) and (state == 1):
    forwardC(10,400)
    state = 2
  if(ir == 1) and (state == 2):
    backC(10,400)
    state = 1
  if(ir == 1) and (state == 3):
    backC(10,1200)
    state = 1
  if(ir == 2) and (state == 3):
    backC(10,800)
    state = 2
  if(ir == 0) and (state == 3):
    backC(10,1600)
    state = 0
  if(ir == 0) and (state == 2):
    backC(10,800)
    state = 0
  if(ir == 0) and (state == 1):
    backC(10,400)
    state = 0