Ce tutoriel présente l’utilisation d’un timer avec la carte Esus. La fréquence du microcontrôleur ESP8266 est de 80Mhz soit 12.5ns le cycle processeur.
Exemple n°1
L’exemple n°1 permet de faire clignoter une led toute les secondes. La led est câble sur la sortie IO2 de la carte Esus.
#include <esusBoard.h>// (80Mhz frequence ESP8266) 1 cycle = 12.5ns => 1seconde/12.5ns = 80000000const int timer_period=80000000;void setup() { initEsusBoard();// sortie 2 pour la led pinMode(2, OUTPUT); noInterrupts();
// initialisation timer 0 avec interruption timer0_isr_init();
// spécifie la fonction à appeler lorsqu'une interruption du timer survient timer0_attachInterrupt(handler);// période du timer timer0_write(ESP.getCycleCount() + timer_period); interrupts();}void loop(){}void handler(void){ timer0_write(ESP.getCycleCount() + timer_period);// toggle sortie 2 digitalWrite(2, !digitalRead(2));}
Exemple n°2
L’exemple n°2 permet de faire clignoter une led toute les 5 secondes. La led est câblé sur la sortie IO2 de la carte Esus.
Ce tutoriel présente l’utilisation du capteur HC-SR04 avec la carte Esus.
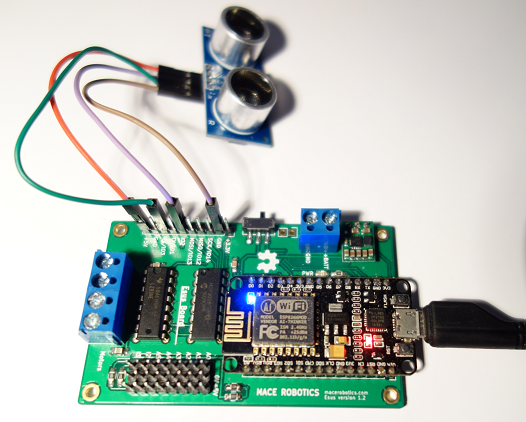
Carte Esus + HC-SR04
Le câblage
Les caractéristiques techniques du capteur HC-SR04 sont les suivantes :
Alimentation +5V
Consommation : 15 mA
Gamme de distance : 2 cm à 4 m.
Sortie : TTL
Pins du capteur:
VCC => sur + 5V de la carte Esus
Trig => sur IO2
Echo => sur IO3
GND => GND
Voici le schéma de câblage :
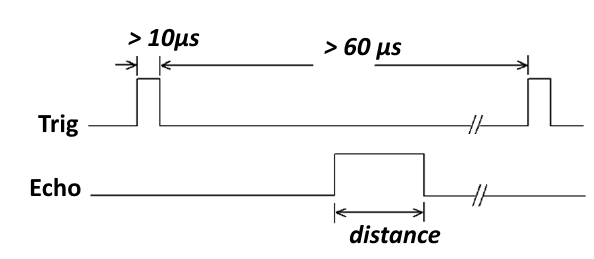
Le capteur ultrason HC-SR04 fonctionne par l’envoi d’une impulsion sur la pin ‘Trig‘, puis un signal impulsionnelle est retourné sur la pin ‘Echo’ en fonction de la distance d’un obstacle. La durée de cette impulsion représente la distance de l’obstacle.
Distance en cm = ( durée de l’impulsion ‘Echo’ en µs ) / 58
Le programme en Arduino
#include <esusBoard.h>// pins #define trig_pin 2#define echo_pin 3void setup() { // init de la carte Esus initEsusBoard(); // init liaison serie Serial.begin (9600); // init pin trig en sortie pinMode(trig_pin, OUTPUT); // init pin echo en entrer pinMode(echo_pin, INPUT); // init pin trig à l'état bas digitalWrite(trig_pin, LOW);}void loop() { long durer;long distanceCm; // mise à l'état haut de la pin trig digitalWrite(trig_pin, HIGH);
// pause de 10µs delayMicroseconds(10);
// mise à l'état bas de la pin trig digitalWrite(trig_pin, LOW);
// mesure de la durée du niveau haut du signal echo durer = pulseIn(echo_pin, HIGH);
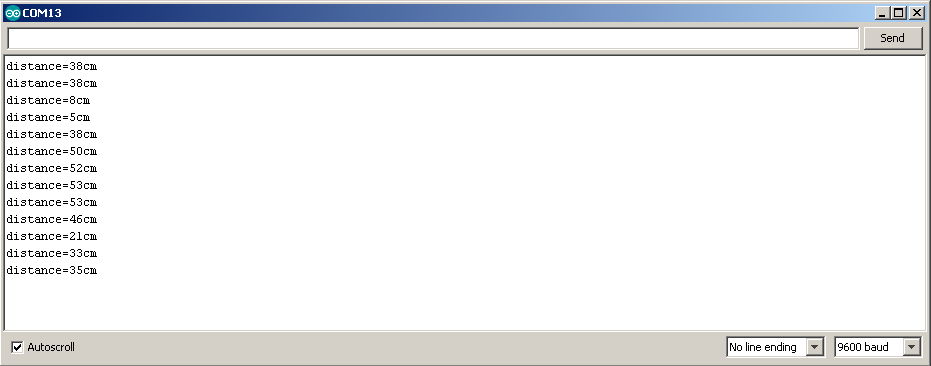
// conversion de la durer en cm distanceCm = (durer/58); // envoi sur le port série de la distance Serial.print("distance= "); Serial.print(distanceCm); Serial.println("cm");
// pause 1 seconde delay(1000);}
Le résultat
Attention, pendant le téléchargement la pin IO3 doit être débrancher du capteur, car le téléchargement à besoin de cette pin (RX/IO3).
Ensuite vous pouvez compiler et télécharger le programme dans la carte Esus.
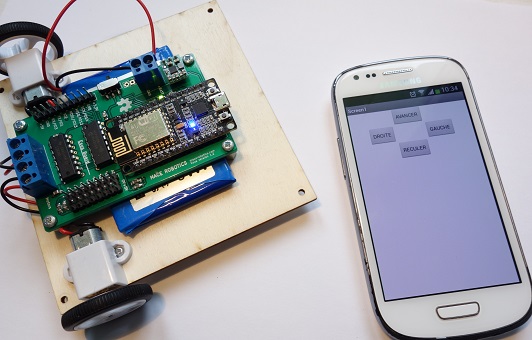
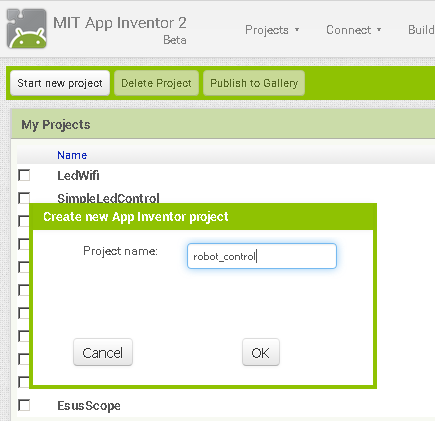
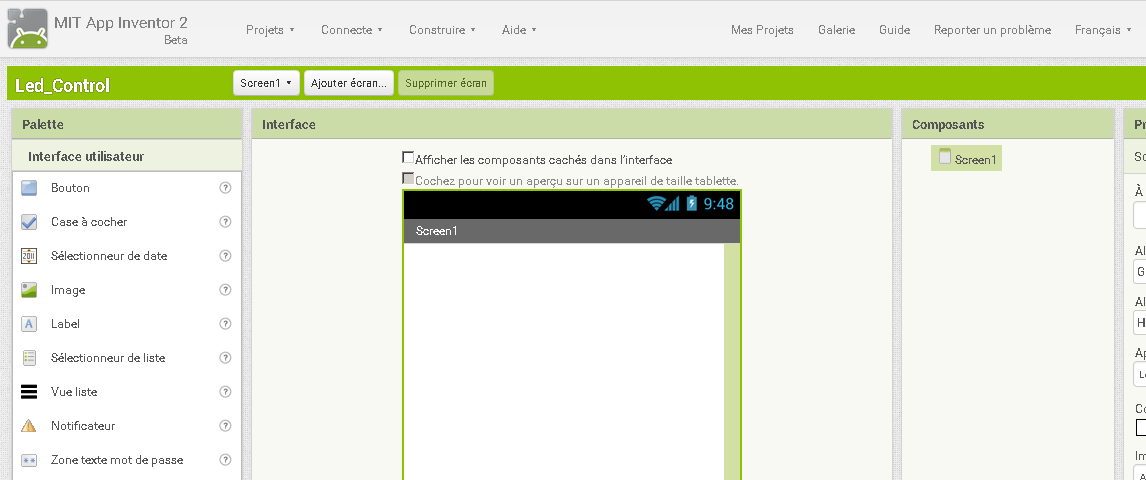
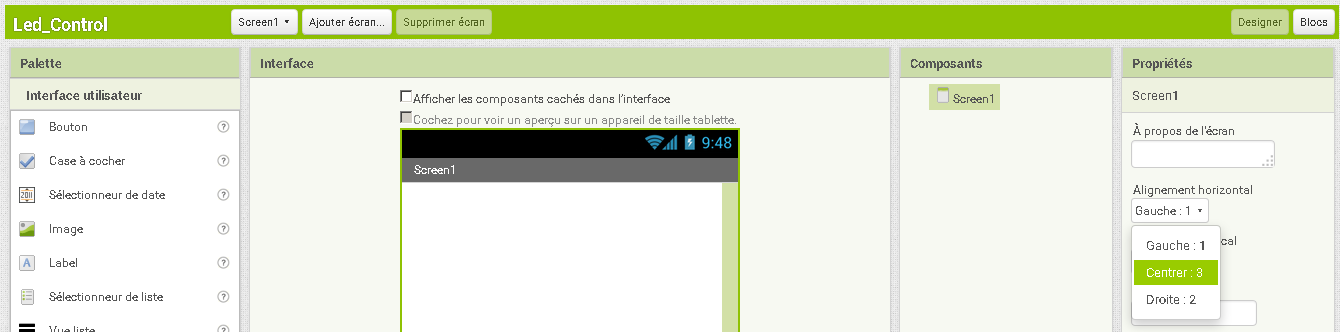
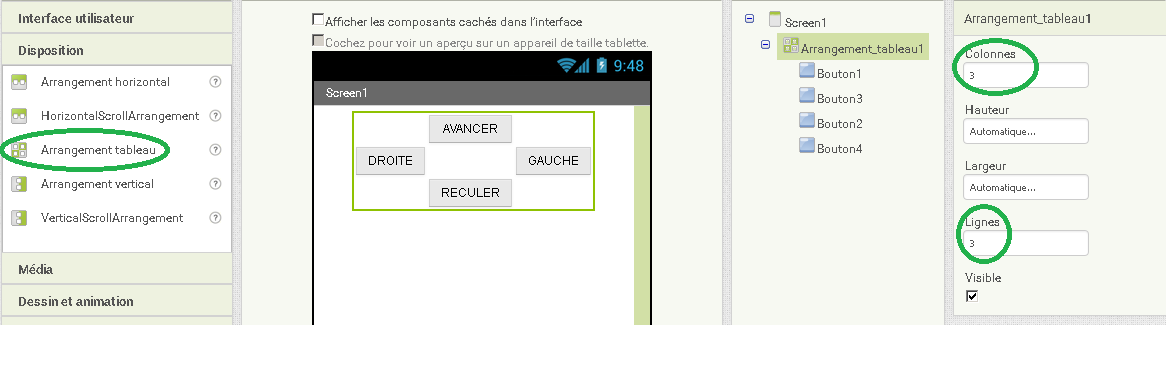
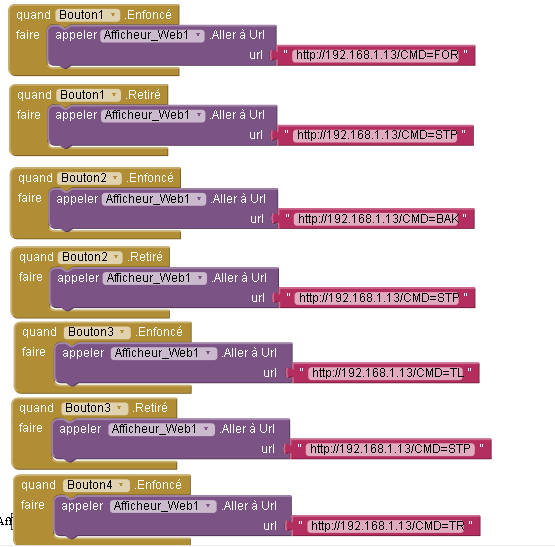
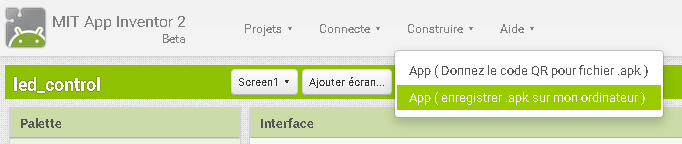
L’application Android
Maintenant, nous allons réaliser l’application Android grâce à App Inventor développé par Google et basée sur une interface graphique similaire à Scratch.
Le servomoteur AX12 est câblé sur la sortie Tx de la carte Esus. Puis le capteur VL53L0X, IO n°2 pour SDA et n°13 pour le signal SDL du bus I2C.
L’alimentation doit être d’au moins 7 Volt pour faire fonctionner le servomoteur. La capteur laser est alimenté par une tension de 3.3V présente sur la carte Esus.
Le code de la carte Esus
La carte Esus contrôle le servomoteur pour le déplacement d’un angle de 0 à 300° aller-retour. De plus, elle gère l’acquisition de la distance obtenu par le capteur VL53L0X.
Voici le setup :
void setup()
{
 // init serial
 Serial.begin(9600);

 // init serial AX12
 swSer.begin(1000000);

 // init I2C
 Wire.begin(2, 13);//SDA, SCL

 // init VL53L0X
 sensor.init();
 sensor.setTimeout(500);

 state = 1;

}
Un tutoriel pour contrôler deux moteurs à courant continu avec la carte Esus.
Contrôle de deux moteurs
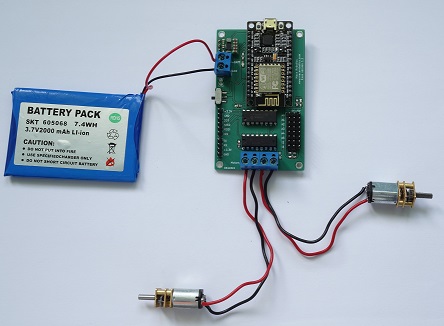
Vous avez besoin :
Une carte Esus,
Une alimentation ou une batterie,
Deux moteurs CC.
Attention , le courant maximum de sortie des ponts en H est de 1.2 A !
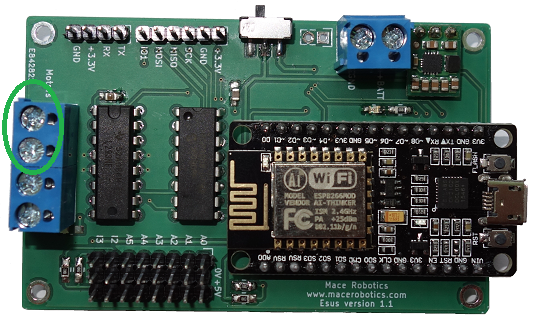
Le branchement
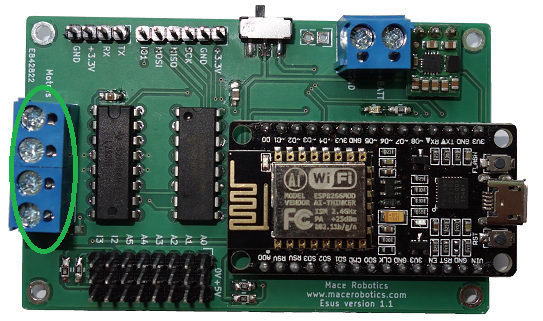
Les moteurs sont à connecter sur le bornier ci dessous :
Ce bornier est relié au composant L293, c’est un double pont en H.
Contrôle des moteurs
Pour contrôler un moteur avec la carte Esus, il faut utiliser la fonction :
void motors1_set(unsigned int speed, boolean direction);

void motors2_set(unsigned int speed, boolean direction);
Un peu d’explication pour ces fonctions:
motors1_set : permet de contrôlé la vitesse et la direction d’un moteur. Cette fonction gère un moteur sur la bornier gauche de la carte Esus.
motors2_set : permet de contrôlé la vitesse et la direction d’un moteur. Cette fonction gère un moteur sur la bornier droit de la carte Esus.
La vitesse varie entre 0 et 1023.
La direction est de type boolean (true ou false) :
DIR_FORWARD = true
DIR_BACK = false
Contrôle d’un moteur
Initialisation de la carte Esus :
#include <esusBoard.h>void setup() {// initialisation de la carte Esus initEsusBoard();}void loop() {}
Ensuite, appel de la fonction de la commande moteur :
void loop() {
// commande moteur avec la vitesse max motors1_set(1023, true);}
Et, maintenant pour contrôler deux moteurs :
void loop() {
// commande moteur avec la vitesse max motors1_set(1023, DIR_FORWARD);
motors2_set(1023, DIR_BACK);}
Exercice
Réaliser un programme pour faire avancer deux moteurs dans un sens, puis après 2 secondes dans un autre sens. Avec une vitesse de 50% de la vitesse maximum.