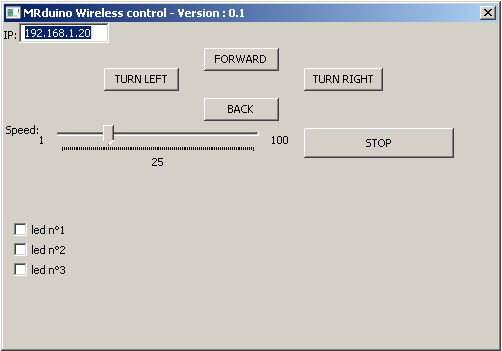
Un tutoriel pour contrôler le robot MRduino Wireless par UDP avec un programme python.
UDP = User Datagram Protocol
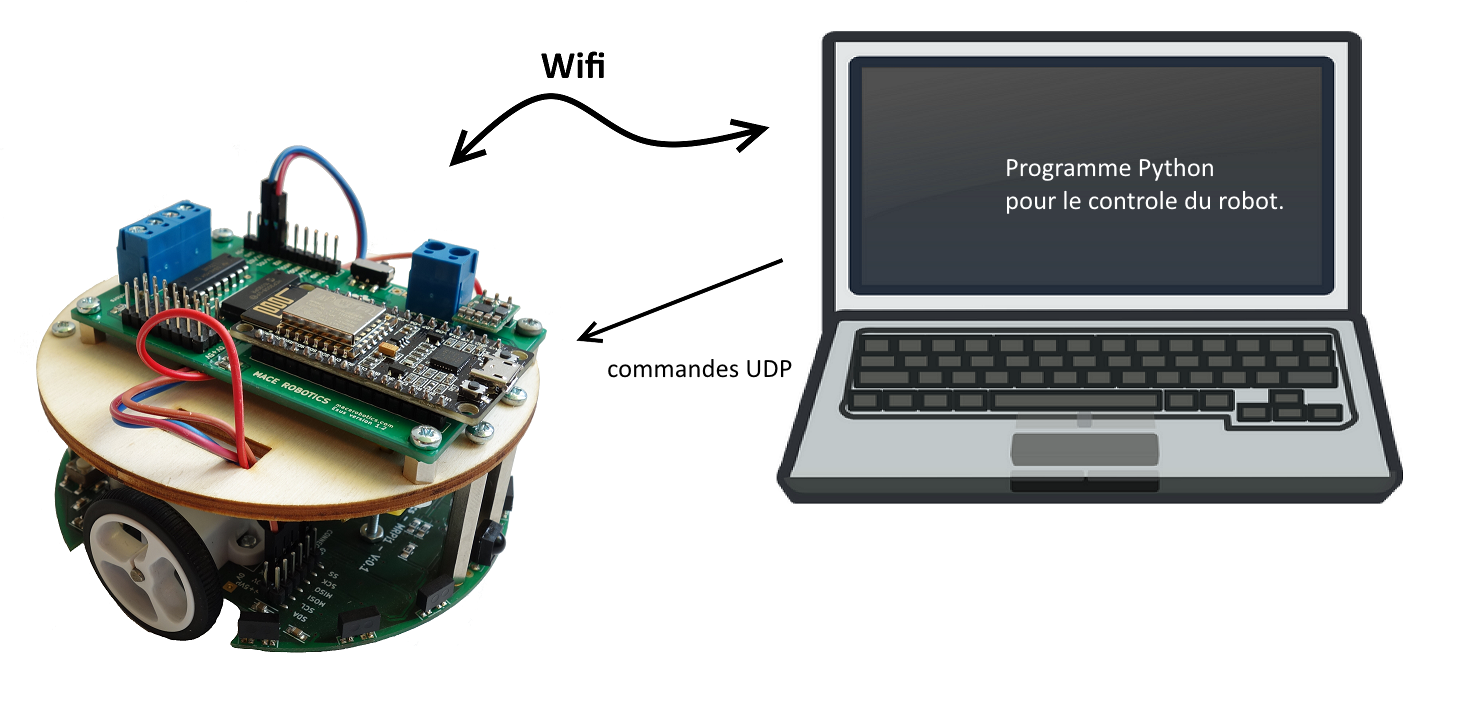
Le contrôle du robot est réaliser par un script en langage python.
Le programme pour le robot
Ce programme permet au robot MRduino Wireless de
Il faut modifier votre SSID et mot de passe de votre réseau Wifi :
const char* ssid = "YOUR_SSID";
const char* pass = "YOU_PASSWORD";
Le programme complet :
#include <ESP8266WiFi.h>
#include <WiFiUDP.h>
#include <mrduino.h>


int status = WL_IDLE_STATUS;
const char* ssid = "FREEMR";
const char* pass = "WIFINICO";

unsigned int localPort = 12345;
byte packetBuffer[512];
WiFiUDP Udp;
int tries=0;

void setup()
{

  Serial.begin(115200);

  // wifi init
  WiFi.begin(ssid, pass);

  Serial.print("[Connecting]");
  Serial.print(ssid);

  // wait connexion
  while (WiFi.status() != WL_CONNECTED)
  {
    delay(500);
    Serial.print(".");
    tries++;
    if (tries > 30)
    {
      break;
    }
  }
  Serial.println();

  printWifiStatus();

  // wifi connexion
  Serial.println("Connected to wifi");
  Serial.print("Udp server started at port ");
  Serial.println(localPort);
  Udp.begin(localPort);
}

void loop()
{
int noBytes = Udp.parsePacket();
String received_command = "";

  if ( noBytes )
  {
    // read UDP packet
    Udp.read(packetBuffer,noBytes);

    for (int i=1;i<=noBytes;i++)
    {
      received_command = received_command + char(packetBuffer[i - 1]);
    }

    Udp.beginPacket(Udp.remoteIP(), Udp.remotePort());
    Udp.endPacket();

    // print command
    Serial.print("COMMANDE =");
    Serial.println(received_command);

  }
}

void printWifiStatus()
{

  Serial.print("SSID: ");
  Serial.println(WiFi.SSID());


  IPAddress ip = WiFi.localIP();

  Serial.print("IP Address: ");
  Serial.println(ip);
}
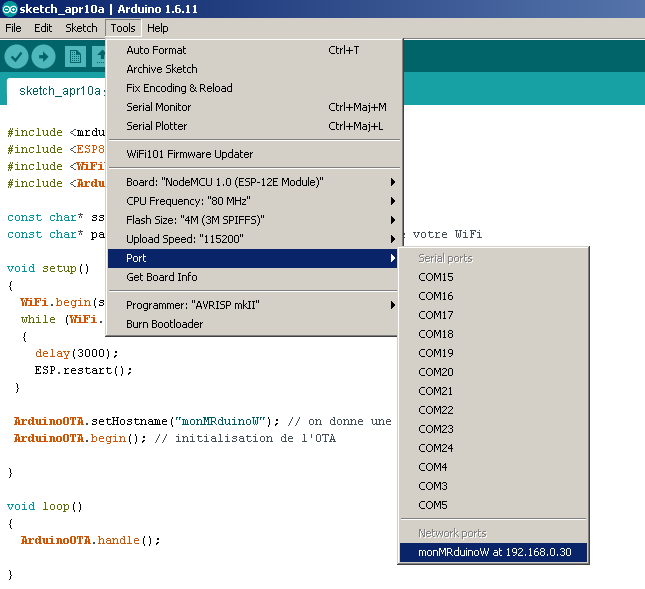
- Compiler et télécharger le programme dans le robot MRduino Wireless
Le script python
Voici un script python pour envoyer une commande au robot :
- Exemple avec la commande pour allumer la led n°1 :
import socket
UDP_IP_ADDRESS = "192.168.0.20"
UDP_PORT_NO = 12345

Message = "#LED,1,1!"

clientSock = socket.socket(socket.AF_INET, socket.SOCK_DGRAM)

clientSock.sendto(Message, (UDP_IP_ADDRESS, UDP_PORT_NO))
- Exemple avec la commande pour faire avancer le robot :
import socket
UDP_IP_ADDRESS = "192.168.0.20"
UDP_PORT_NO = 12345

Message = "#MF,20!"

clientSock = socket.socket(socket.AF_INET, socket.SOCK_DGRAM)

clientSock.sendto(Message, (UDP_IP_ADDRESS, UDP_PORT_NO))