Le vernis épargne ?
Le vernis épargne est une fine couche de résine polymère souvent de couleur verte permettant de protéger le cuivre de l’oxydation et empêcher la formation de court-circuit entre les pistes ou pads d’un composant CMS.
Problème possible
Une marge du vernis épargne trop grande peut supprimer l’épargne nécessaire entre les pads d’un composant CMS :
Couche masque de soudure coté top (F-Mask), fichier gerber .gts :
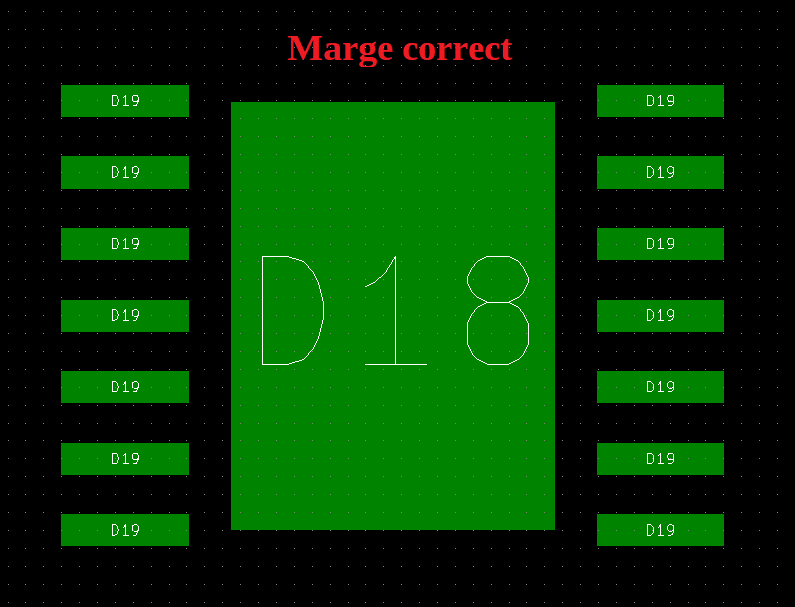
Les pads du composants seront bien entourés de vernis épargne :
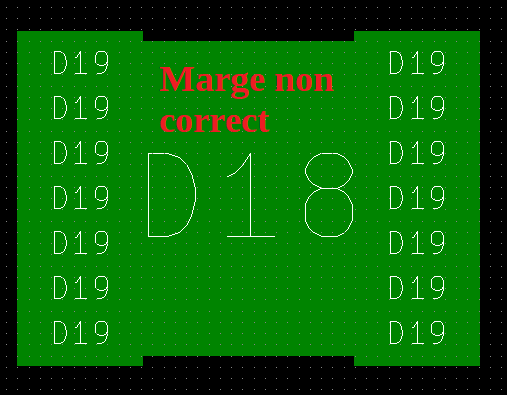
Les pads du composants ne seront pas bien entourés de vernis épargne :
Modifier la marge
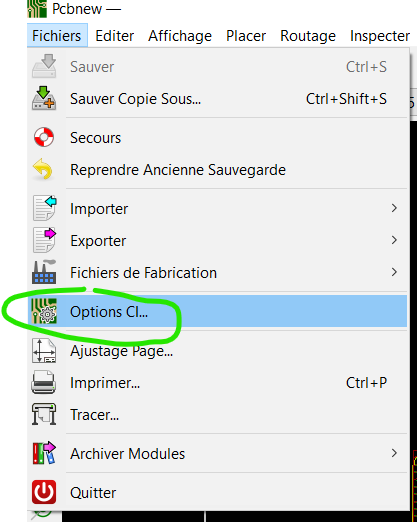
Dans PCBnew :
- Fichiers -> Options CI
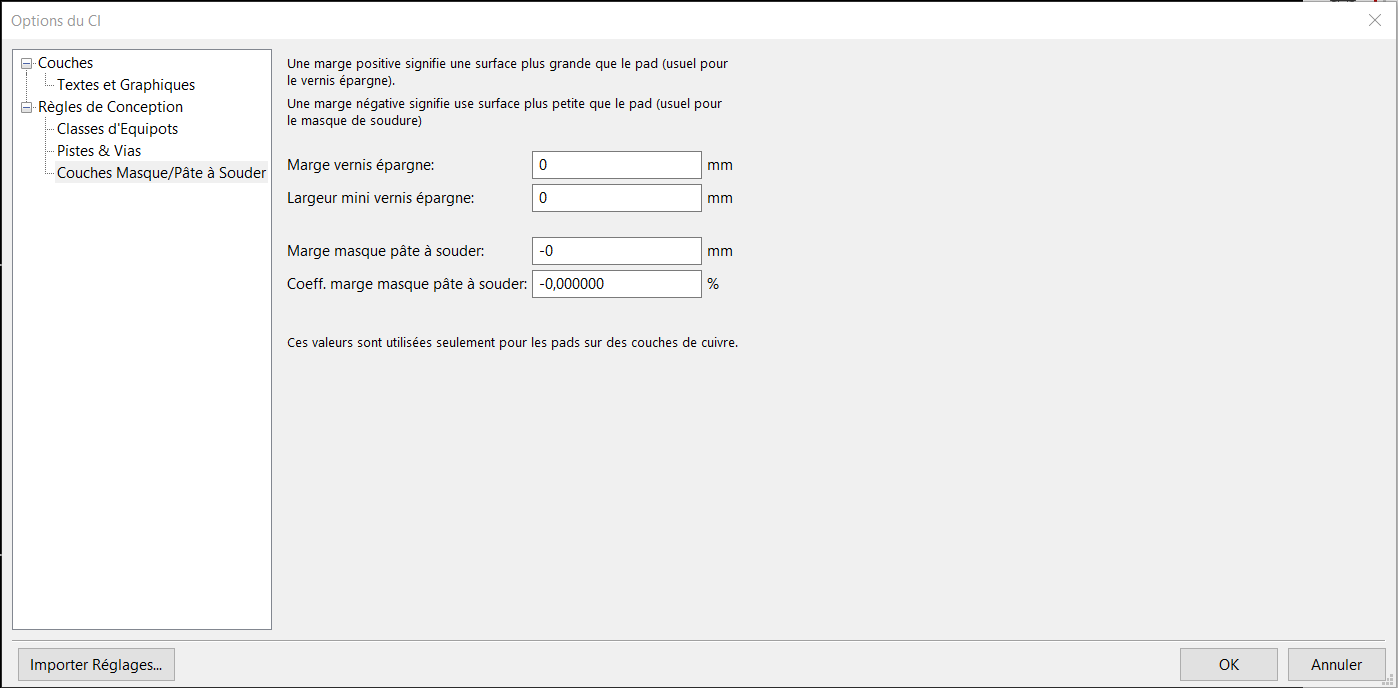
Options du CI :
Fin.